Growing Vegetables in Wicking Beds
Part Four of the Vegetable Patch from Scratch Series
Last week I looked at material choices for constructing rasied garden beds. This week I discuss construction of wicking beds, plus their pros and cons.
About the Vegetable Patch from Scratch series
This serialised gardening guide is designed to help everyone from complete novices to seasoned gardeners to get more productivity from their vegetable patch with less effort.
Wicking beds aim to increase food production, while using much less water than conventional raised garden beds. Think of a wicking bed as a giant self-watering plant pot. Water is drawn up into the soil via capillary action from a reservoir in the bottom of the wicking bed. Crates, tanks, baths, troughs, IBCs (intermediate bulk containers) and drums can all be used to create wicking beds. Timber raised garden beds or apple crates are also ideal for wicking bed projects.
Watering a wicking bed is easy. All you need to do is keep the reservoir topped up occasionally (every week in summer). Wicking beds can tolerate dry summer conditions better than normal gardens. There’s no need for an automated irrigation system, so they are great for renters. They can be more water efficient, and as such, they are also great for those who don’t have time to spend watering their vegetable patch every day over summer.
The water held in the reservoir can only leave the bed by capillary action up through the soil profile. As the water is drawn up, most of the moisture is accessed and used by the plants. With standard raised garden beds, much of the irrigation water that you apply usually drains down the sides, or straight out of the bottom. Watering from the top means that a lot of the water evaporates straight off the soil surface, before it has a chance to soak into the soil. However, with a wicking bed, almost every drop of water gets held in the system and made available to the plants, where they need it most – at their root zone. A wicking bed can also act a bit like a rainwater tank, capturing spring rainfall and storing it for use by the plants in early summer.
Constructing wicking beds
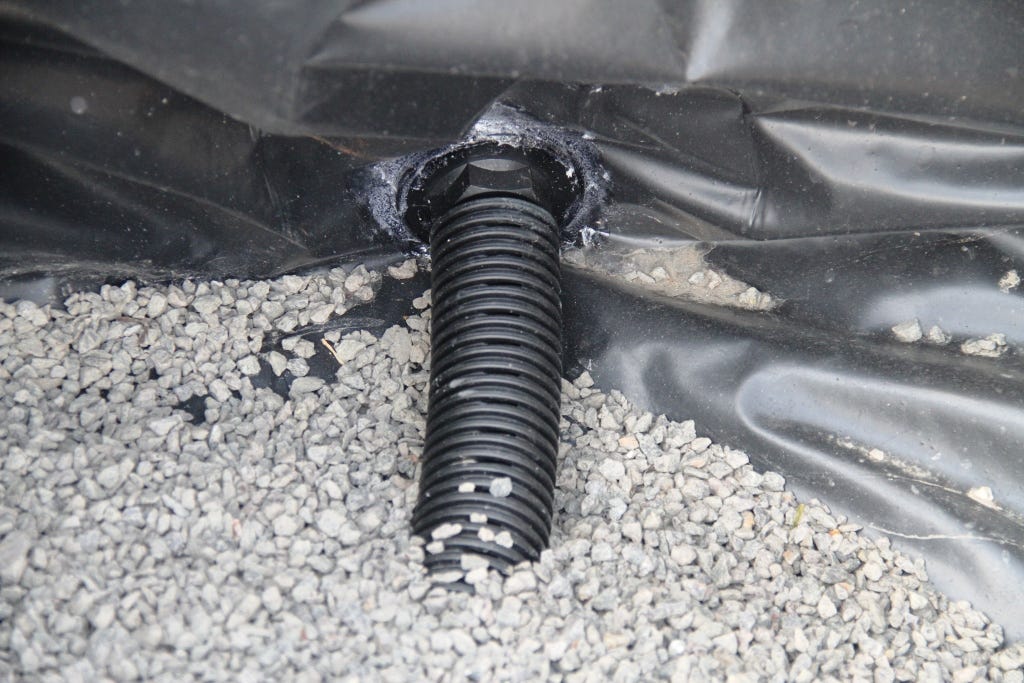
First, construct a waterproof reservoir in the base of your bed. This liner needs to be 500 microns (half a millimetre) thick. There are specific potable grade liners available for this purpose or you can use pond liner. Avoid using builder’s film, as it is only 200 microns thick and isn’t UV stable. If you use builder’s film, it may tear during installation. At best you will have two to three years of satisfactory use from builder’s film before it degrades, develops holes and needs replacing.
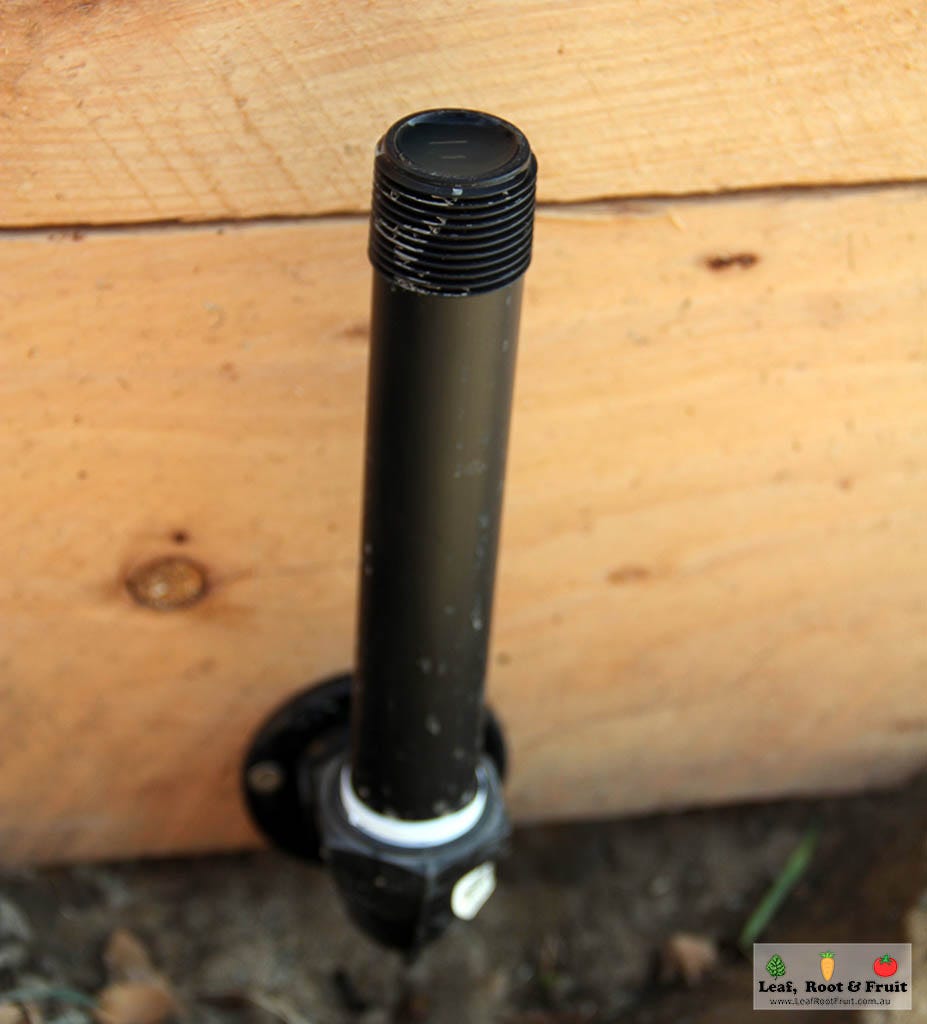
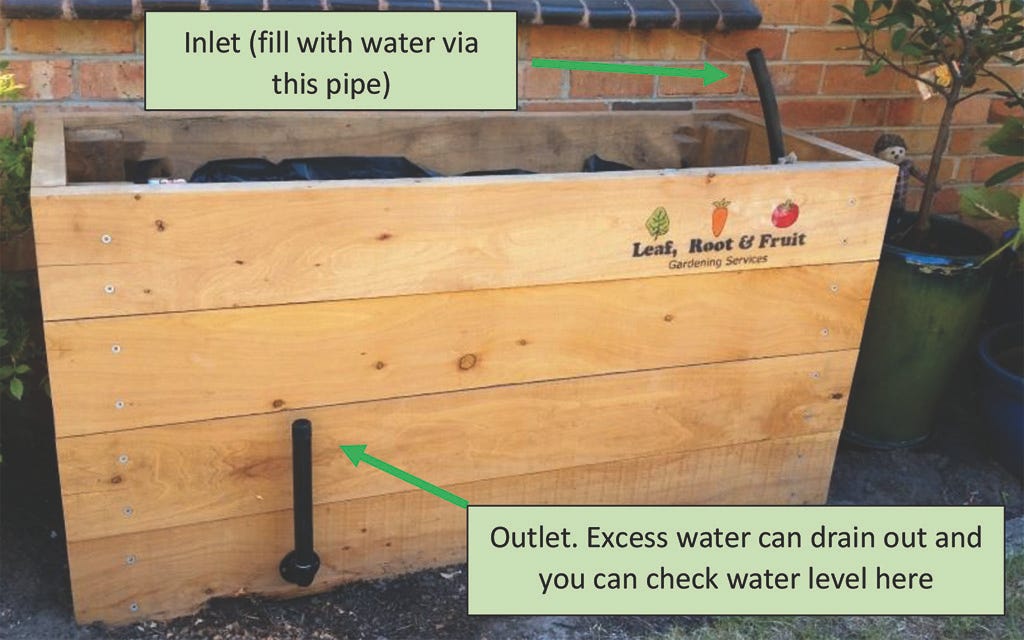
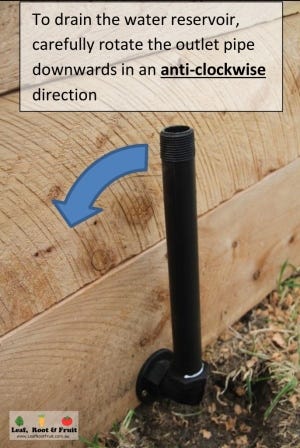
Next, install an overflow pipe in the reservoir to prevent the garden bed filling with water right to the top. The overflow pipe must be positioned so that the water level is a few centimetres below the top of the gravel (you will add the gravel in the next step). I find that a 25 millimetre tank outlet, with an elbow and riser installed, works well for the overflow. If you need to empty the reservoir later, you can rotate the tank outlet 90 degrees. This outlet type also enables you to easily check the water level of the garden bed. If the level has dropped more than a few centimetres below the surface – which means no water will come out when you rotate the tank outlet – then it’s time to top up.

Lay some ag-pipe (slotted drainage pipe) in the bottom of the reservoir. This will help water to move through the reservoir much faster when you fill it. You’ll also need to install an inlet pipe for filling the garden bed with water.

Fill the reservoir with scoria or gravel. Never use sand, because the water cannot flow through it fast enough.

Now add a layer of geofabric on top of the scoria or gravel to separate the soil medium from everything else and prevent it from washing down into the reservoir and clogging it up. Shovel a premium blended soil over the geofabric for planting into.

Topping up the wicking bed with water is easy. Simply connect your garden hose to the inlet. Turn the hose on and watch the level in the outlet pipe rise. Once the water level reaches the top of the outlet pipe, simply turn off the tap and disconnect the hose.

Over time, nutrients from fertilisers, compost and manures will concentrate in the water reservoir, so it’s a good idea to drain the wicking bed and refill it with fresh water every year or so.
Wicking beds: The bottom line
At first glance, wicking beds seem very practical and an obvious choice for any gardener. If set up properly, they have a few specific advantages over standard raised garden beds. They:
require less water
keep soil moisture more consistent
reduce competition from large trees with invasive root systems.
However, wicking beds also come with their own set of limitations:
From an environmental perspective, the pond liner and other fittings have an ecological footprint. Does the water saved in your garden justify these inputs?
DIY wicking beds are often poorly constructed, leading to leaks, anaerobic soil conditions or poorly performing beds that end up wasting more water than would be used in a conventional raised garden bed.
They are expensive to install professionally, so the money saved through using less water may be negated by the high set-up costs.
Plants grown in wicking beds are limited in their access to nutrients and access to the surrounding ecosystem. They are essentially growing in a huge plant pot. Plants grown in wicking beds are reliant on gardeners balancing and topping up nutrients.
The liner is easily damaged by garden forks, stakes and other sharp implements.
Wicking beds are most useful in specific circumstances, such as:
sites where trees with invasive roots limit opportunities for growing vegetables
where soil issues such as contamination or poor drainage cannot be overcome with conventional raised beds
where standard automated irrigation is not possible.
where properties are solely reliant on tank water, and wicking beds can increase water harvest and storage.
However, generally I don’t see the need for using wicking beds to grow produce. Growing plants in a standard raised garden bed, or preferably in the ground, with adequate irrigation, means lower set-up costs, more flexibility for future plans, and often growing conditions that are as good as, if not better than, wicking beds.
How have wicking beds performed for you?
This post is one of many in my gardening series Vegetable Patch from Scratch. See the series index for a list of other topics in the series.
Read the next post in the Vegetable Patch from Scratch series:
PART 5: Growing vegetables in the ground


Great article I want to set up wicking beds as we are on tank water. Would it also help to protect vegetables from frost as we live in a cold area where we can occasionally get snow. Keep up the good work
It's a long watch (I'd recommend skipping to time 44:02 for the summary), but the video "Wicking Bed Design Webinar" from the channel Small Farms Network Capital Region on Youtube talks about how someone did their PhD on which wicking materials and setup work best. For anyone who might be reading this and interested